Showing posts with label nail polish. Show all posts

Wednesday, 13 June 2012

Beauty review: Savee

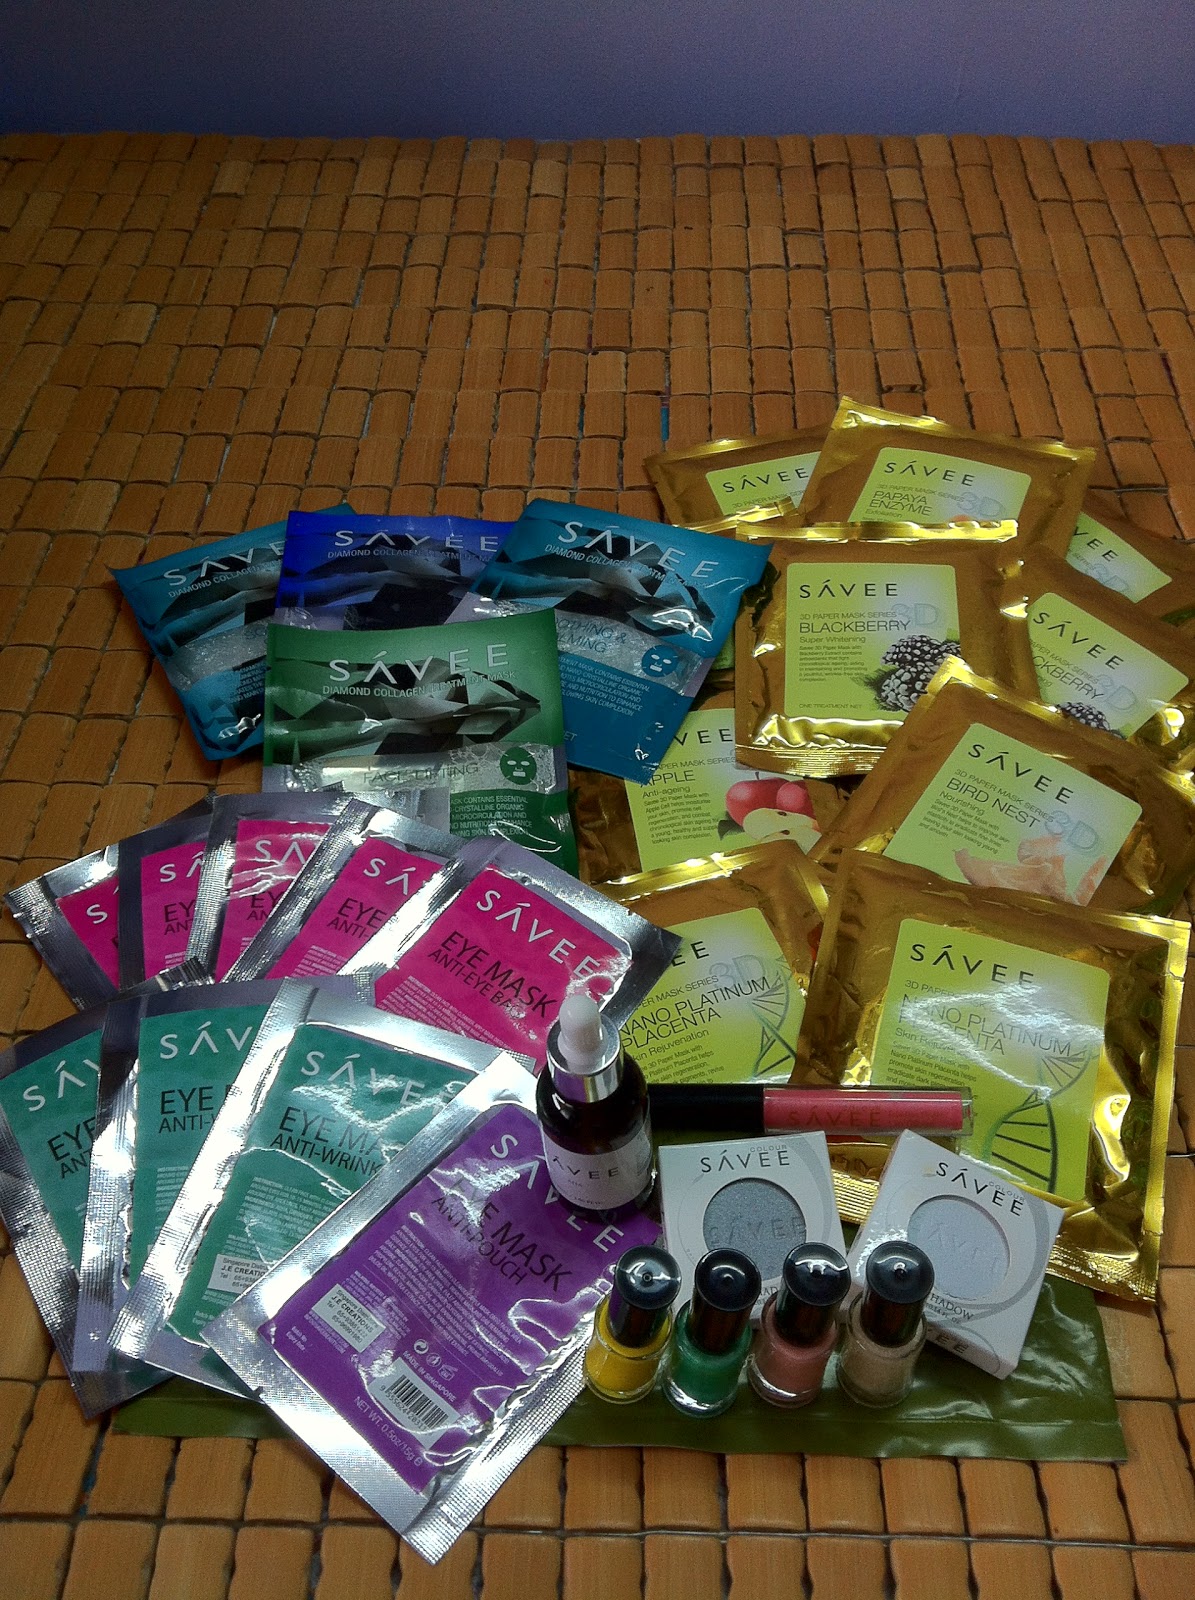
 Remember my post about my savee buys back then?


Remember my haul from Savee? I’ve see a noticeable improvement to my complexion from my daily application of the AHA. Results were great! However, as AHA makes your skin thinner, I stopped after 2 weeks as per recommended. I’ve only tried Savee’s AHA, so I’m not sure how it measures up against other brands.
I have two Savee’s eye shadow in my possession, grey and white. I can’t say I’m very pleased with the products, but for their price point, I guess the white is reasonable, but not the grey. The colour payoff of the products isn’t good, as I intended to use the white as a highlighter; the colour payoff isn’t my priority as I prefer to have my highlighter sheer. But for the grey, as I’m using it as eye shadow, I can’t have it being sheer plus it’s application is uneven. So grey is off my list.
I’ve already made a review on the yellow and green nail polish from Savee, here. I finally got about to trying out the pink and white recently, but the quality isn’t consistent. The pink nudish nail polish is way too streaky for my liking, thou my OPI topcoat helped to soothe out the application; the final result is still uneven and streaky. The white nail polish on the other hand is fantastic! I love the application and in comparison with the other colours, it isn’t streaky and I’m very pleased with the iridescent. Maybe it is uneven as well, but due to the iridescent, it isn’t obvious to the naked eye. One layer of the white is enough for those who prefer a sheer finish on their nails. Personally, I prefer to have two coats. I will probably purchase the white again, but I will give the other colours a pass. Pictures will be up once I get the time to get around it, so stay tuned!

Thursday, 17 May 2012

Inspo: Hungergames trinket nails


inspirations


 Products used:
Sponge; can be found in Daiso
Red nail polish; Skinfood RE101
Gold glitter nail polish Fay's  

I instagram too! @shermieloves

I decided to recreate these hunger games nails.  It wasn’t as good as I expected it to be, but really, how good can it be when I finished them in just a few minutes? I’m no manicurist, I definitely need more than just a few minutes, but time don’t permit.. So… this is the finished look. I still need lots of practises.


Monday, 16 April 2012

my beauty buys from savee


Just when I'm in need of masks, I found some cheap ones that seems not bad! It's during one of the event I was working at somewhere last week. So don't ask me where they are now, cause I've no idea. Though I do know that they have a shop/warehouse at the far west area, jurong or boon lay I believe.


The face masks, I bought some for my mom too.. (:


The jelly masks and eye masks, I tried the pink one, it's not too bad, the size of my eye bag did shrunk, for that one night only though. Not to forget I will have very bad eyebags whenever I wake up early in the morning. ):


So girls, if you are interested in the items, go to saveebeauty.com and enquire..
Oh, I've also tried the AHA serum thingy, on the first day, my face have a nasty yellow undertone, after that, it's fine already. I'm using AHA now because my skin is pretty bad now, after the vietnam trip, my skin have yet to recover from all the nasty scars, and also, with the exam stress, I keep having breakouts. )): The AHA seems to help some, I've only used it for a couple of days, not too sure of the goodness yet, but so far, so good. (:


I've tried the green and the neon yellow ones already. I've to say the neon yellow one aren't fantastic.. But what's to expect for neon polishes? Neon polishes tends to run streaky, so, not so surprising here, but another thing is, this yellow one get dirty easily, I don't know how to explain this, but it feels a little sticky, and thus attracts dirt easily? OH OH, and it smells realy bad, even after bathing, I still can detect a tinge of stench, mostly for the yellow one only. The green one is a cream finish, it's OKAY I guess, nothing  much to talk about it.. Both colours are painted with two layers with no base coat and top coat. I'm not done with them yet, if time permits, I might do some easter eggs theme with them. (:

Friday, 6 April 2012

DIY: A breath of new life to hair accessories


 Do you have childhood clips lying around the house? Begging for attention but you can't possibly be seen in daylight with such outdated designs.Well, I happened to come across these clips and its such a waste to just chuck it into the bin. So......


I painted it black! With my trusty black nail polish that's reaching the end of it's shelf life.
Now its ready to be used once more. It's blotchy now, because I accidentally dropped it while it's still wet from the polish.):


Another clip to be revived. 


I added some glitter to the black clip, so, who says you needa buy new clips when your old one's colour faded? Apply some nail polish, and you will have new clips. Good as new!


I can't find the link for pa, if it helps, this is how it looks like.


OR205


Nail polish used: PA nails, some japanese brand I think, you can find these brands at bugis level 2, or far east level 3/4. 

OR205 from Thefaceshop


Saturday, 31 March 2012

DIY: add some colours to your accessories


I had a great haul shopping at shopwildwolves.
This spring, if you wanna add some colours to your accessories collection, I may have something for you here. (:


I saw this at asos, similar concept earrings here.


And I decided to.......DUPE IT. (With flash.)


(Without flash) The ring on the background is the ring from asos.


See the differences? I'm in love with my new set of rings.  
On nails: For audrey; Chinaglaze


From left to right, for audrey, lilacism, or 205, la girl, skinfood.


So how did I achieve this look? The answer to it is…… Nail polish! 

It’s really simple. The ring came in with dividers in place so there’s no trouble in the ratio of painting. Just paint one layer of nail polish in the colour that you fancy per portion. Its ok to let it overlap a lil, we’ll remove it later. Once all the colours are in, with the use of a cotton bud and nail polish remover(Sally Hansen), gently swab the dividers to let the gold show, it’ll really enhance the look. Once the touch ups are complete, use a clear nail polish to give it some shine and you are done! Easy right?

For the ring on the left, I used some sort of blue from skinfood, I can’t read Korean and thus can’t list the actual shade here. I also used the coral red from LA girls under the disco brites series. 

For the ring on the left, I used Lilacism from Essie, For Audrey from China Glaze, OR205 from thefaceshop. (: 

Sunday, 18 March 2012

Home remedy: Keeping your accessories longer part II


Picture 1: without nail polish


Picture 2: With nail polish, as you can see, the difference is really minimal. It's a little shinier and colour would be more vibrant.


The top row is without nail polish, the row at the bottom is with nail polish. For coloured pieces, nail polish might help in adding the vibrancy. The difference is more noticeable up front as compared in photos. 

Why do I paint my stuffs? 
  1. To slow down the "rusting" speed. 
  2. To prevent scratches. 
  3. To prevent staining
  4. To add vibrancy
  5. I like my things shiny. (:


Sunday, 4 March 2012

Home remedy:keeping your accessories longer


My ring organiser box. I love this colour.


Only two rings out of these collections are not treated with nail polish.


my poor board. 


I'm using this currently, instead of the daiso one which I had been using previously. I think they all work the same, as long as you use a clear nail polish and NOT top coats.


This is an up-close photo of how it looks like with nail polish on it. For this ring, I applied two rich layers, don't ask me why. Usually I use just one rich layer, but I guess this ring is special?  If you are not a fan of shiny finishes, you will probably not like this home remedy. This is just my own personal way of keeping my accessories longer, they might not work for you. #justsaying


This is how I organise my rings, my poor box getting a little overloaded, my necklace organiser board is also getting way overcrowded. I really need the new room soon. For now, my entire necklace collection will have to be cramped into one small board. ):

Also, this is how I take care of my accessories, I think, I might be getting those varnish for wood/metal material. This is what happen when you buy cheap accessories. So far, nail varnishes have served me well. But I feel, it won’t be long lasting, and eventually, like how it chipped off while on our nails, it will get chipped off while on my accessories. I don’t want them to rust. So, a little effort goes a long way. (: Do you have your own home remedy for this too? Do share with me!

Friday, 13 January 2012

DIY project: collar


So, recently there is a collar craze, and I thought I would just join in. Since they help jazz up outfit effortlessly(almost).
So these are what you would need, sequins, collar, thread the same color as your collar (in my case: white) and needle.
I got the collar from a old white t-shirt my bro owned.


From daiso, $2sgd

So, I finished the other heart shape bottle, and bought this one instead. Again, it's not a top coat, it's a clear nail polish which imma use on my accessories not my nails. This is my third bottle, I finished two bottles and yes, I did spammed it on my accessories.
Anyway, this picture is up because I'm in love with anything heart shaped, and I think it's cute. This have nothing to do with the collar above.